
Create images
Pro
Use Create to make an image, adjust its settings and continue from a result. In a wide window, settings are on the left, the canvas is in the middle, and image actions are on the right. In a narrow window, the panels stack. Scroll to reach the settings, canvas and image actions.
Make an image
Section titled “Make an image”- Open Image Lab and stay on Create.
- Under Model or preset, pick a model, such as FLUX.3 Image Klein. The list has the image models and image presets your API key can use.
- Pick a Shape, or leave it on Auto.
- Type what you want to see in What do you imagine? For example:
A chunky retro sneaker in cream suede with tangerine laces and a translucent sole, floating above a pastel pink studio backdrop, soft shadow, studio product photo. - Click Generate, or press ⌘ ↵ (Ctrl Enter on Windows and Linux).
The image appears on the canvas, and the prompt box empties for your next idea. If the request fails, your words and any input pictures go back into the box. Click the image to see it larger. The large view has the same previous and next arrows as the canvas, and ← and → move between images without closing it. Click the picture, click the ×, or press Esc to close the large view. Save image saves a copy to your computer.
Check the save message before closing Nexus. Saved to Gallery. confirms that the image is kept on this machine. If Gallery saving cannot be confirmed, use Save image to keep a copy on your computer.
Short of ideas? An empty canvas has eight examples under Try an idea, such as Stormy lighthouse, Paper fox and Sky whale. Click one to fill the prompt.
The key picker next to Generate sets which client API key Image Lab uses. Pick the key your app will use, so you see what it can do. No key yet? Create one in API keys.
Start a new image
Section titled “Start a new image”Click New image at the top right of the page. It works once there is something to clear: an image on the canvas, a picture in the prompt box or a prompt. It is greyed out while an image is being made. The canvas clears and shows the examples again, the input picture is removed, and the prompt empties with the cursor in it. Model or preset, Shape and Quality stay as they were.
It’s in the same place as New chat in Chat Lab, and shows on the Create tab only. Use it to stop changing an image and start something new. The images you made stay in Your images and the Gallery.
After a full Nexus restart, Create opens with an empty canvas. Find earlier images in Gallery.
To clear changes to the settings, click Reset settings above Model or preset. For a model, this restores its defaults. For a preset, it restores the preset’s saved settings. Your prompt, reference images and canvas stay in place.
Settings
Section titled “Settings”Basic shows the settings most people need. Advanced shows them all. What you see also depends on the model: a setting the model doesn’t have is hidden.
Image Lab requests 1 image each time you click Generate. To explore another result, use More like this.
| Setting | What it does | Shown in |
|---|---|---|
| Model or preset | The model or preset that makes the image. | Basic |
| Shape or Size | Pick a supported image shape or size. Local models offer Auto, 1:1, 3:4, 4:3, 16:9 and 9:16. Online models show their supported sizes. | Basic |
| Aspect ratio and Resolution | Separate shape and resolution choices, when the model offers them. | Basic |
| Quality | Pick a quality the model supports. On FLUX.3 Image Klein, Low, Medium and High use 8, 12 and 16 steps. Auto uses 8. Online models can offer different choices. | Basic |
| Custom size | An exact width and height, such as 512x512, when supported. Local models use 256 to 2048 pixels per side, in multiples of 32. Smaller is faster. |
Advanced |
| Steps (under Detail) | How many passes the model makes. More steps can add detail and take longer. Only FLUX.3 Image Klein lets you set it (1 to 100). The other local models use a fixed number. | Advanced |
| Prompt strength (under Detail) | How strongly the prompt guides the image. Local models accept 0 to 30, including decimals. Leave it blank for the model’s default. Higher values can change image quality. | Advanced |
| Seed | The starting point. The same seed, prompt and settings give the same image. Leave it blank for a new one each time. Shuffle picks a random seed. | Advanced |
| Leave out | Things to avoid, such as text, logos. This is guidance, not guaranteed removal. |
Advanced |
| Save as preset | Keeps the model and these settings as a preset your apps can call. See below. | Advanced |
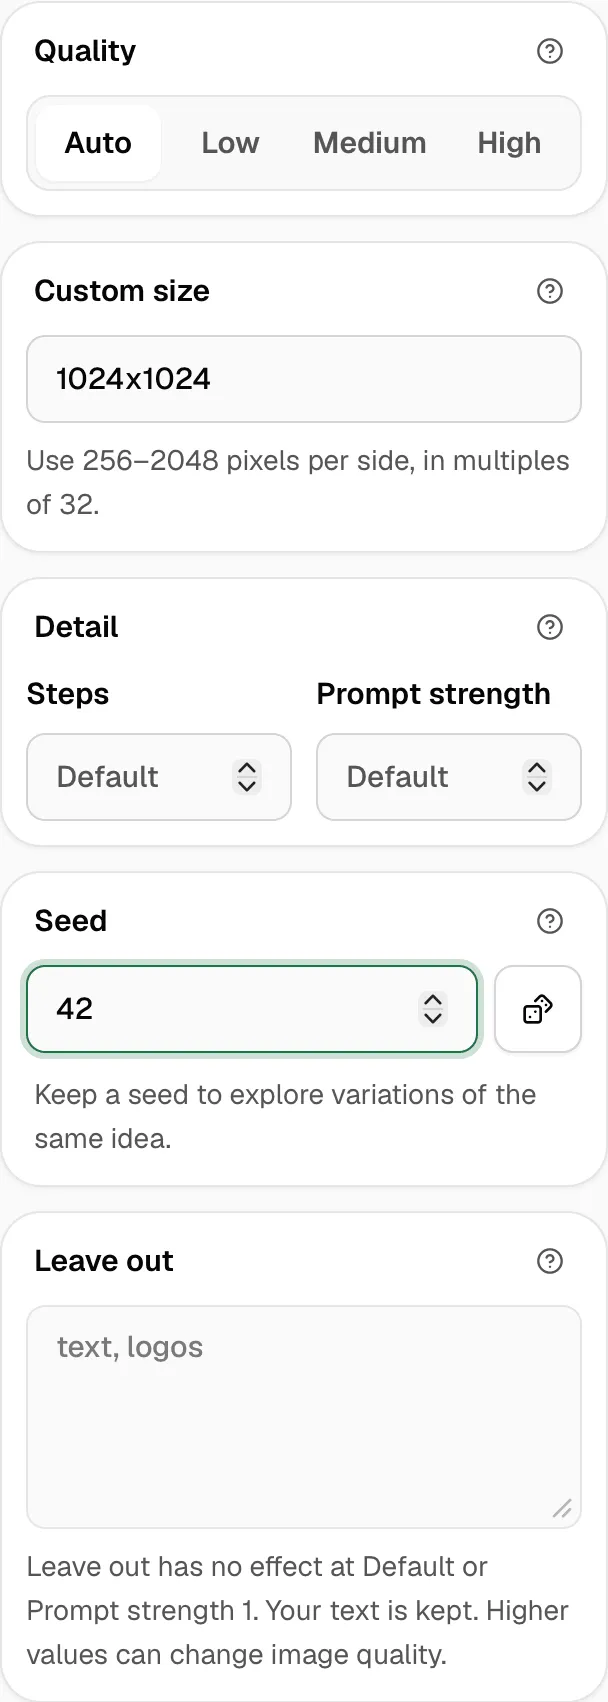
For local models, Leave out has no effect at the default Prompt strength or at 1. The field is inactive, and your text is kept. Below 1, the model can favor the things listed there. Above 1, exclusions can affect the result, but unwanted objects may remain.
Online models show their supported controls, including when you use a preset. Local settings such as Steps or Prompt strength do not appear unless the model supports them.
While the image forms
Section titled “While the image forms”With a local model, the canvas shows a soft preview of the image as it forms, the step it’s on, such as Step 4 of 8, and the time so far.
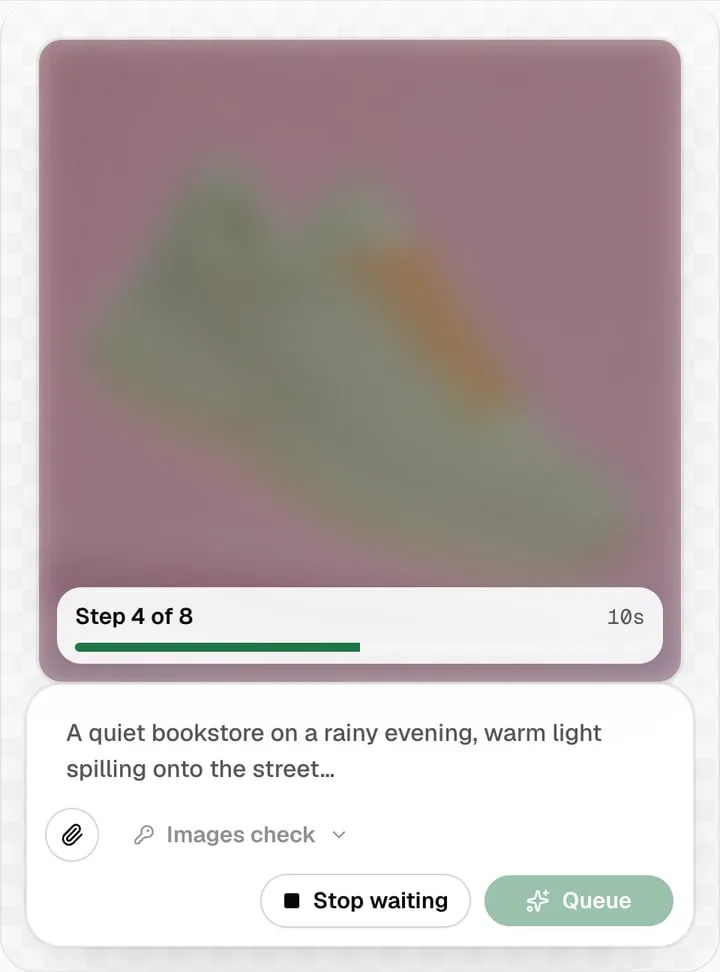
You don’t have to wait to start the next one. While an image forms, Generate becomes Queue: write another prompt and click it. Up to 8 images can wait in the queue. Their places show as Queued tiles on the right.
Stop waiting stops the image in progress and clears the queue. With a local model, Nexus also stops the work. A provider may still finish the image, and may still charge for it.
The cards on the right
Section titled “The cards on the right”Do more with this image has ways to continue from the image on the canvas:
- Add to comparison picks the image for a side-by-side comparison.
- More like this makes a new image from the same prompt and settings, with a new seed.
- Change this image and Use as a guide start a change. They show only for models that change images, and for presets built on one when your key can also use that model. See Change images.
- Reuse prompt and settings fills the prompt and the settings, seed included, so you can adjust one thing and try again.
Every finished image becomes the one shown: on the canvas, in Your images and in Steps to this image. That includes quick changes and More like this.
How it was made shows the prompt, with Copy prompt beside it, and Model, Size, Shape, Steps, Seed, Input images (for a change) and Time. The small trash button at the top right of the card deletes the image from this machine. For a changed image, Steps to this image shows how you got there. See Change images.
Your images shows the newest saved images. Click one to put it back on the canvas.
To move between images without leaving the canvas, point at the image or tab to it: Previous image and Next image arrows show on the left and right of the image. The ← and → keys do the same. They follow the order of Your images, newest first: → shows the next tile, an older image, and ← the one before it. The keys do nothing while you type in a field, while a dialog is open, or while an image is being made. See all in the gallery opens the Gallery.
Save a look as a preset
Section titled “Save a look as a preset”A preset keeps a model and its settings under one name. Image Lab and your apps can then use the preset like a model.
- Pick a model and set it up the way you like, in Advanced. For example, Custom size
1024x1024and Quality Medium. - Under Save as preset, type a Preset name, such as
Product shot. - Click Save as preset.
Image Lab says “Preset saved. It’s ready to use in your apps.” The preset shows in Model or preset, and in Presets. If the key you picked can’t use it, Image Lab says so. Give the key access in API keys.
A seed you type in Seed is saved with the preset, and every image from it starts from that seed. Leave Seed blank for a new image each time.
A preset’s settings are defaults. A request can still set any of them. Save as preset needs a model, not another preset. See Save a look as a preset and call it from an app.
If something goes wrong
Section titled “If something goes wrong”| Message | What to do |
|---|---|
| Local images are busy. Try again shortly. | Another image is being made with a different local model. Wait for it to finish. |
| The queue is full. Wait for an image to finish. | 8 images are waiting already. |
| A preset with this name already exists. Choose another name. | Type another Preset name, or edit the existing preset in Presets. |
| These settings aren’t supported by this model. | Open Advanced and clear the settings this model doesn’t take, such as Steps on a fixed-step model. |
| Choose a supported image size. | Use 256 to 2048 pixels per side, in multiples of 32. |
| No image models for this token | The API key can’t use any image model. Pick another key, or give this one access in API keys. |
| Local images are turned off for this machine. | Click Open settings and turn local images on. Then click Check availability. |
| Turn on gateway access for this machine to create images. | Image Lab makes images through the gateway. Click Open settings and turn it on. |